In the world of beauty and fashion, nail art design has emerged as a captivating form of self-expression. From minimalist patterns to intricate masterpieces, the possibilities are endless. Whether a seasoned nail art enthusiast or a beginner, this guide will inspire you to explore various designs and techniques to enhance your nails.
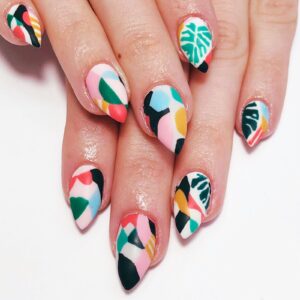
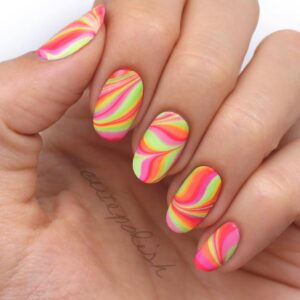
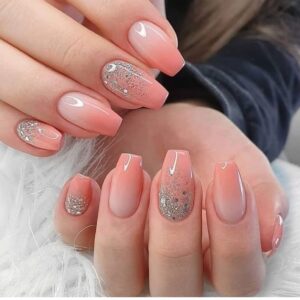
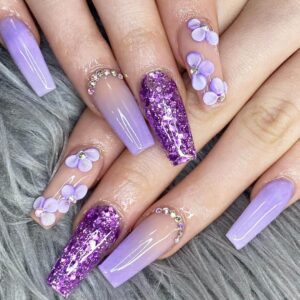
Table of Contents
-
-
2.2 Floral Patterns
-
2.3 Geometric Shapes
-
2.4 Ombré Effects
Introduction to Nail Art Design
Nail art design involves decorating and embellishing nails to create visually appealing patterns and styles. It’s a creative outlet that allows individuals to showcase their personality and preferences. With the right tools and techniques, anyone can transform their nails into miniature canvases.
Top Nail Art Design Trends
Staying updated with current trends can provide fresh ideas for your next manicure. Here are some of the most popular nail art designs:
Minimalist Designs
Simplicity is timeless. Minimalist nail art focuses on clean lines, negative space, and subtle accents, offering an elegant and understated look.Pinterest+1Pinterest+1
Floral Patterns
Bring a touch of nature to your fingertips with floral designs. From delicate daisies to bold roses, floral patterns add a feminine and vibrant flair to any outfit.
Geometric Shapes
Geometric nail art incorporates shapes like triangles, squares, and lines, creating a modern and edgy appearance. Combining different shapes and colors can result in unique designs.
Ombré Effects
The ombré technique blends colors seamlessly, transitioning from light to dark shades. This gradient effect can be achieved with various color combinations for a stunning visual impact.Shopify
3D Embellishments
For those seeking a more dramatic look, 3D nail art includes elements like studs, rhinestones, and beads, adding texture and depth to your nails.
Step-by-Step Nail Art Tutorials
Creating beautiful nail art at home is both fun and rewarding. Here are some tutorials to get you started:
Classic French Tip
-
Preparation: Start with clean, trimmed nails. Apply a base coat to protect your nails and enhance polish adhesion.
-
Base Color: Paint your nails with a nude or pale pink polish. Allow it to dry completely.
-
White Tips: Using a white nail polish or pen, carefully paint the tips of your nails. Aim for a smooth, even line.
-
Finishing Touch: Once the white tips are dry, apply a top coat to seal the design and add shine.
Polka Dot Delight
-
Base Color: Choose a vibrant color for your base and apply it to all nails. Let it dry.
-
Dotting: Using a dotting tool or the end of a bobby pin, dip into a contrasting color and create evenly spaced dots on each nail.
-
Top Coat: After the dots dry, apply a clear top coat to protect your design.
Gradient Ombré Nails
-
Base Color: Apply a light-colored polish to your nails and let it dry.
-
Sponge Technique: On a makeup sponge, apply two or more colors in stripes. Dab the sponge onto your nail, rolling slightly to blend the colors.
-
Blend: Repeat the dabbing process until you achieve a smooth gradient.
-
Clean Up: Use a brush dipped in nail polish remover to clean any excess polish from your skin.
-
Top Coat: Seal your design with a glossy top coat.
Floral Accent Nails
-
Base Color: Paint all nails with a neutral shade.
-
Accent Nail: On one or two nails per hand, apply a contrasting color as the base.
-
Floral Design: Using a fine brush, paint small flowers on the accent nails.
-
Details: Add leaves or additional details to enhance the design.
-
Top Coat: Finish with a clear top coat to protect your artwork.
Geometric Chevron Design
-
Base Color: Apply a light color to all nails and let it dry.
-
Tape Application: Place nail art tape in a chevron pattern on each nail.
-
Second Color: Paint over the taped nails with a bold color.
-
Remove Tape: While the polish is still wet, carefully remove the tape to reveal sharp lines.
-
Top Coat: Seal